Gauge Control with Xamarin Forms
Alright, this idea started by the necessity of using a Custom Control that is not in the package of Xamarin Forms Controls, so I found another alternatives, the first idea was to get a license of third party Packages to use beautiful built controls, but the idea is to save money, so.....
I search on Internet about SkiaSharp that basically allows you to create a Custom Canvas on the surface of views and here we go.
Create and Configure the Project
Create a blank Xamarin.Forms project and add the SkiaSharp.Views.Forms NuGet package to all Projects (Portable, Android and iOS).
Making up the Control
Let's assume that you have worked with Custom Controls, so I'm not going to explain on detail what I'm doing.
The control, in this case the Gauge Control will be made up of a Canvas View (SKCanvasView), the OnPaintSurfaceMethod and BindableProperties.
Now we need to add parts of our future control which we will place in the OnPaintSurfaceMethod, so the Main building blocks are:
- SKPaint is used to defining styling for our graphic to be drawn.
- SKRect defines our rectangle with coordinates (X1,Y1) (X2,Y2).
- SKPath is used to draw a graphic along a path.
SkiaSharpFiddle
Please welcome to the awesome tool called SkiaSharpFiddle. With this tool you can see the code and the graphic output of that.
You can test it on your browser without downloading it.
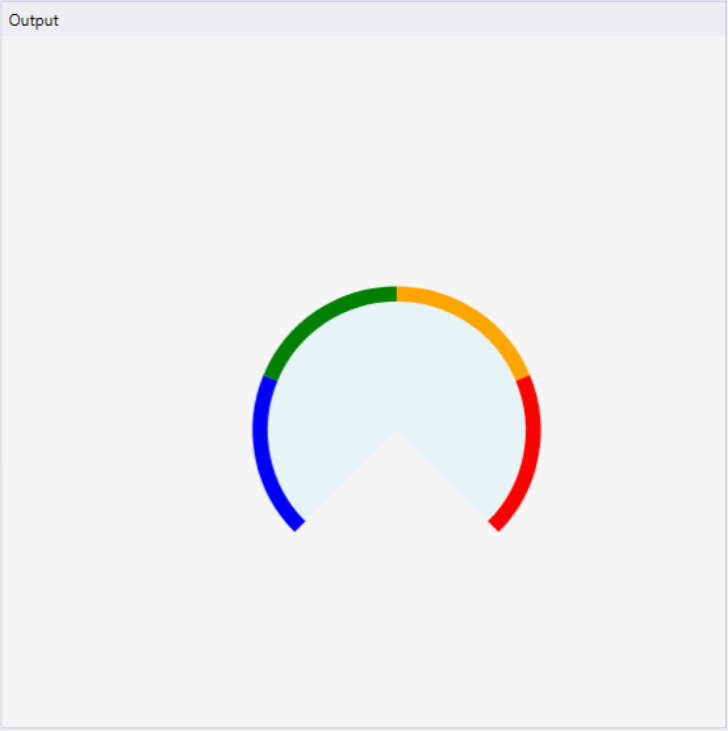
Let’s see how easy is to use this tool and save our time). Basically, we will add layer by layer to get the desired result. First let’s add a background and the main arc with different colors. To get different colors on the main arc I have used 4 different paths. Each color represents a separate velocity range.
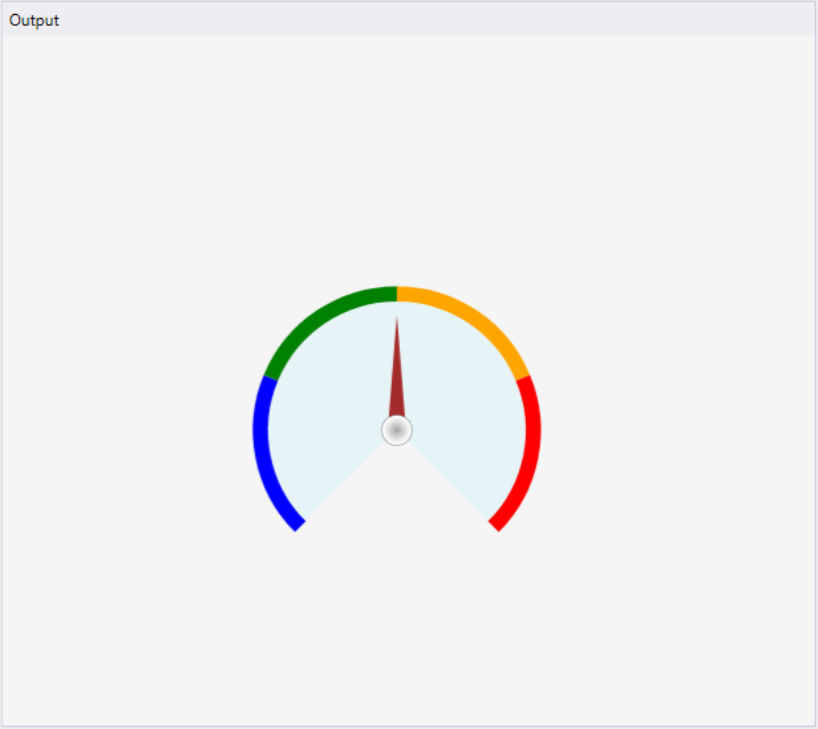
Next let’s add a needle with a screw. The needle should come before screw. The screw is tuned with a nice radial gradient
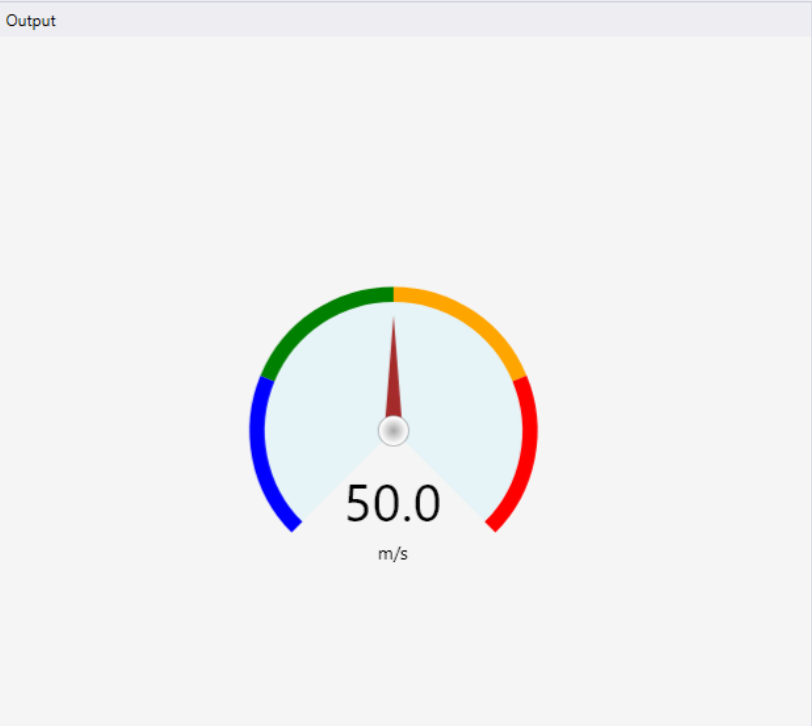
Also we need to add a label to show the current Value.
As you can see we can easily tune our control and see changes in real time without running Visual Studio.
Animation
And last but not least:), let’s add some animation. Animating our needle is basically redrawing the gauge at various data intervals and finally stopping at the target value.
To demonstrate the animation I have added a timer and RND generator that generates new values every two seconds in the given range [0-100]
Wrapping Up
As you can see SkiaSharpFiddle is a really huge time saver and allows us to tune controls easily and see changes in real time.
Like all before posts, you can download the full code here: